How to Convert a Picture to a Vector in Art Stitch
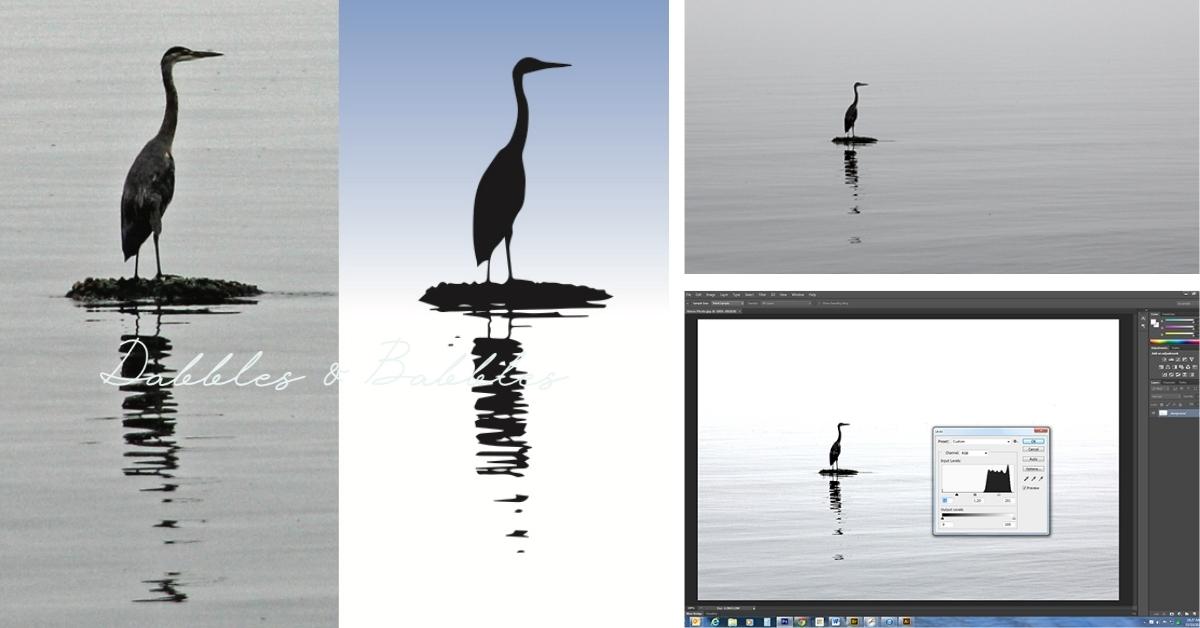
How to Brand Vector Silhouettes from a Photo – Silhouettes are always a prissy impact in any composition and they're really really easy to create from a photo. To clarify for everyone, vector images are images that will calibration to any size without losing their sharpness and clarity – some people refer to them as clipart. Make sure that you lot choose a photo that doesn't take a busy background and has a pregnant contrast between the item you want to convert into a silhouette and the background behind it. I'm using this tranquil heron photo I took this summer on a foggy day at the beach. I use this trick often in my work as a graphic designer and thought this would be a great design tip to share.
This tutorial requires a high resolution photo, photo editing software (I employ Photoshop CS6) and Adobe Illustrator (CS6).
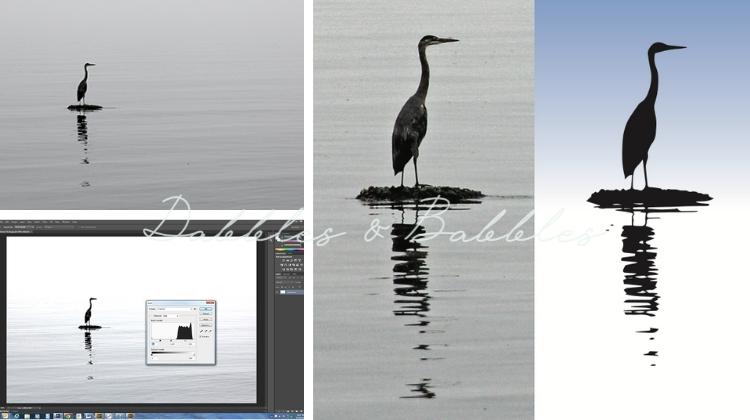
- Open up your selected photo into Photoshop or some sort of photo editing software. Our goal is to brand the photo have as much contrast as possible without totally distorting the image. There are a few dissimilar ways to accomplish this task and I'll show you lot two different methods. Feel free to utilize what you're comfortable with.

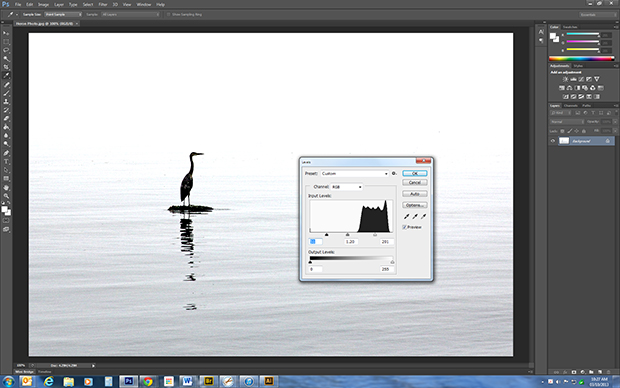
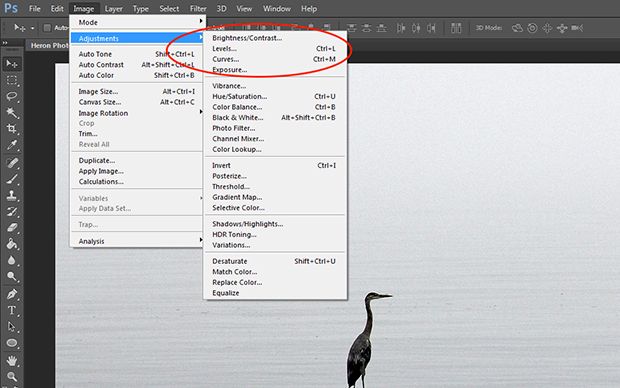
- METHOD 1: Become to Prototype > ADJUSTMENTS > LEVELS. Grab the tiny triangular input sliders and slide them around until you take a very light background and a dark image that volition become the silhouette. Generally that means that y'all'll move the sliders on the left slightly towards the right, the middle slider volition become very slightly to the left and the right slider will movement in to the left quite a bit. Yous'll take to eyeball this a bit and see what looks all-time. The goal here is to make the groundwork as calorie-free as possible without washing out any black while making the nighttime areas darker.
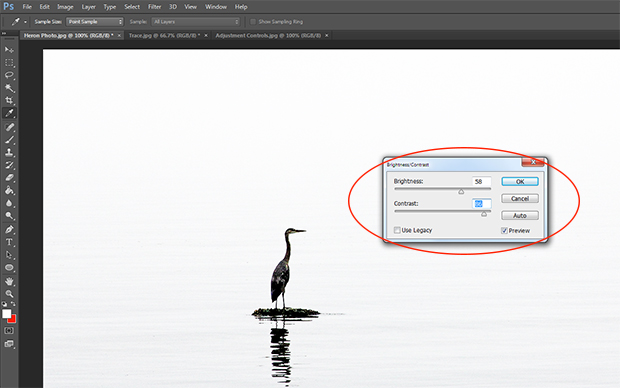
- METHOD two: Become to Paradigm > ADJUSTMENTS > BRIGHTNESS/CONTRAST. Motion both sliders to the right until you attain your desired result (loftier dissimilarity without washing out the image yous desire to become the silhouette).
- Once you're satisfied with the colour settings, crop your page to select the role of the prototype you want for your pattern. Salve your prototype.
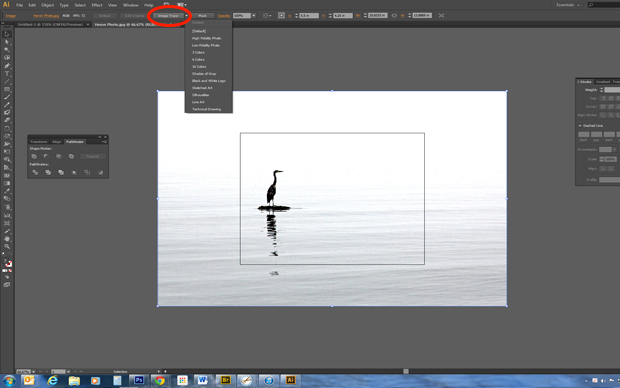
- Open up Illustrator and open up your photo. Select your photo using the SELECTION tool (black pointer) and you'll notice that in the properties bar at the top, a Live TRACE push will appear (or Image TRACE depending on which version of Illustrator you have). Click on the LIVE TRACE or IMAGE TRACE push button. (If you're non super happy with the results, you can click on the white arrow to the left of the Image TRACE button and play effectually with the various settings – I detect the Black and White Logo setting can work well too). In one case you've clicked the LIVE TRACE or Prototype TRACE push button you'll notice that it now says Expand. With your image still selected, click on the Aggrandize button.
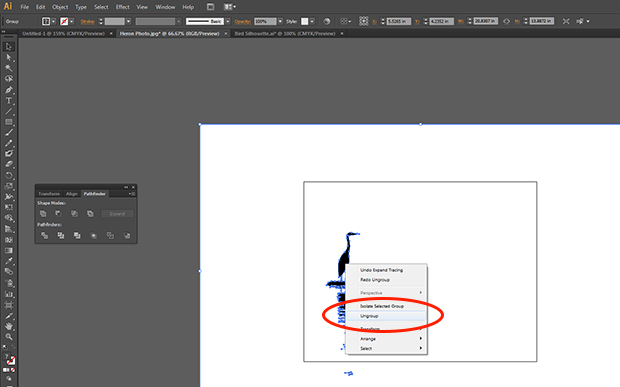
- With the image selected, right click your mouse and toggle down to UNGROUP and click on it. Now, click on a white area of the drawing and so that information technology'due south selected and then go to SELECT > Same > FILL COLOUR and all the white in your image will be selected, hit the DELETE push button. Your goal here is to get rid of all the white sections of your image.
- Select all the blackness items on the canvas, right click your mouse and toggle downward and click on group. Now your sketch is all grouped together. (Don't carp with this step if you'd like to move the various elements of the image around on the folio or alter them individually).
- At this point yous can go creative, add color and use the vector on superlative of backgrounds, photos, etc. Use your silhouette to create or enhance your very own piece of work or art.
I created this printable page for the tutorial and you're welcome to download and print information technology. Download hither.


Source: https://dabblesandbabbles.com/make-vector-silhouettes-from-a-photo/
0 Response to "How to Convert a Picture to a Vector in Art Stitch"
Post a Comment